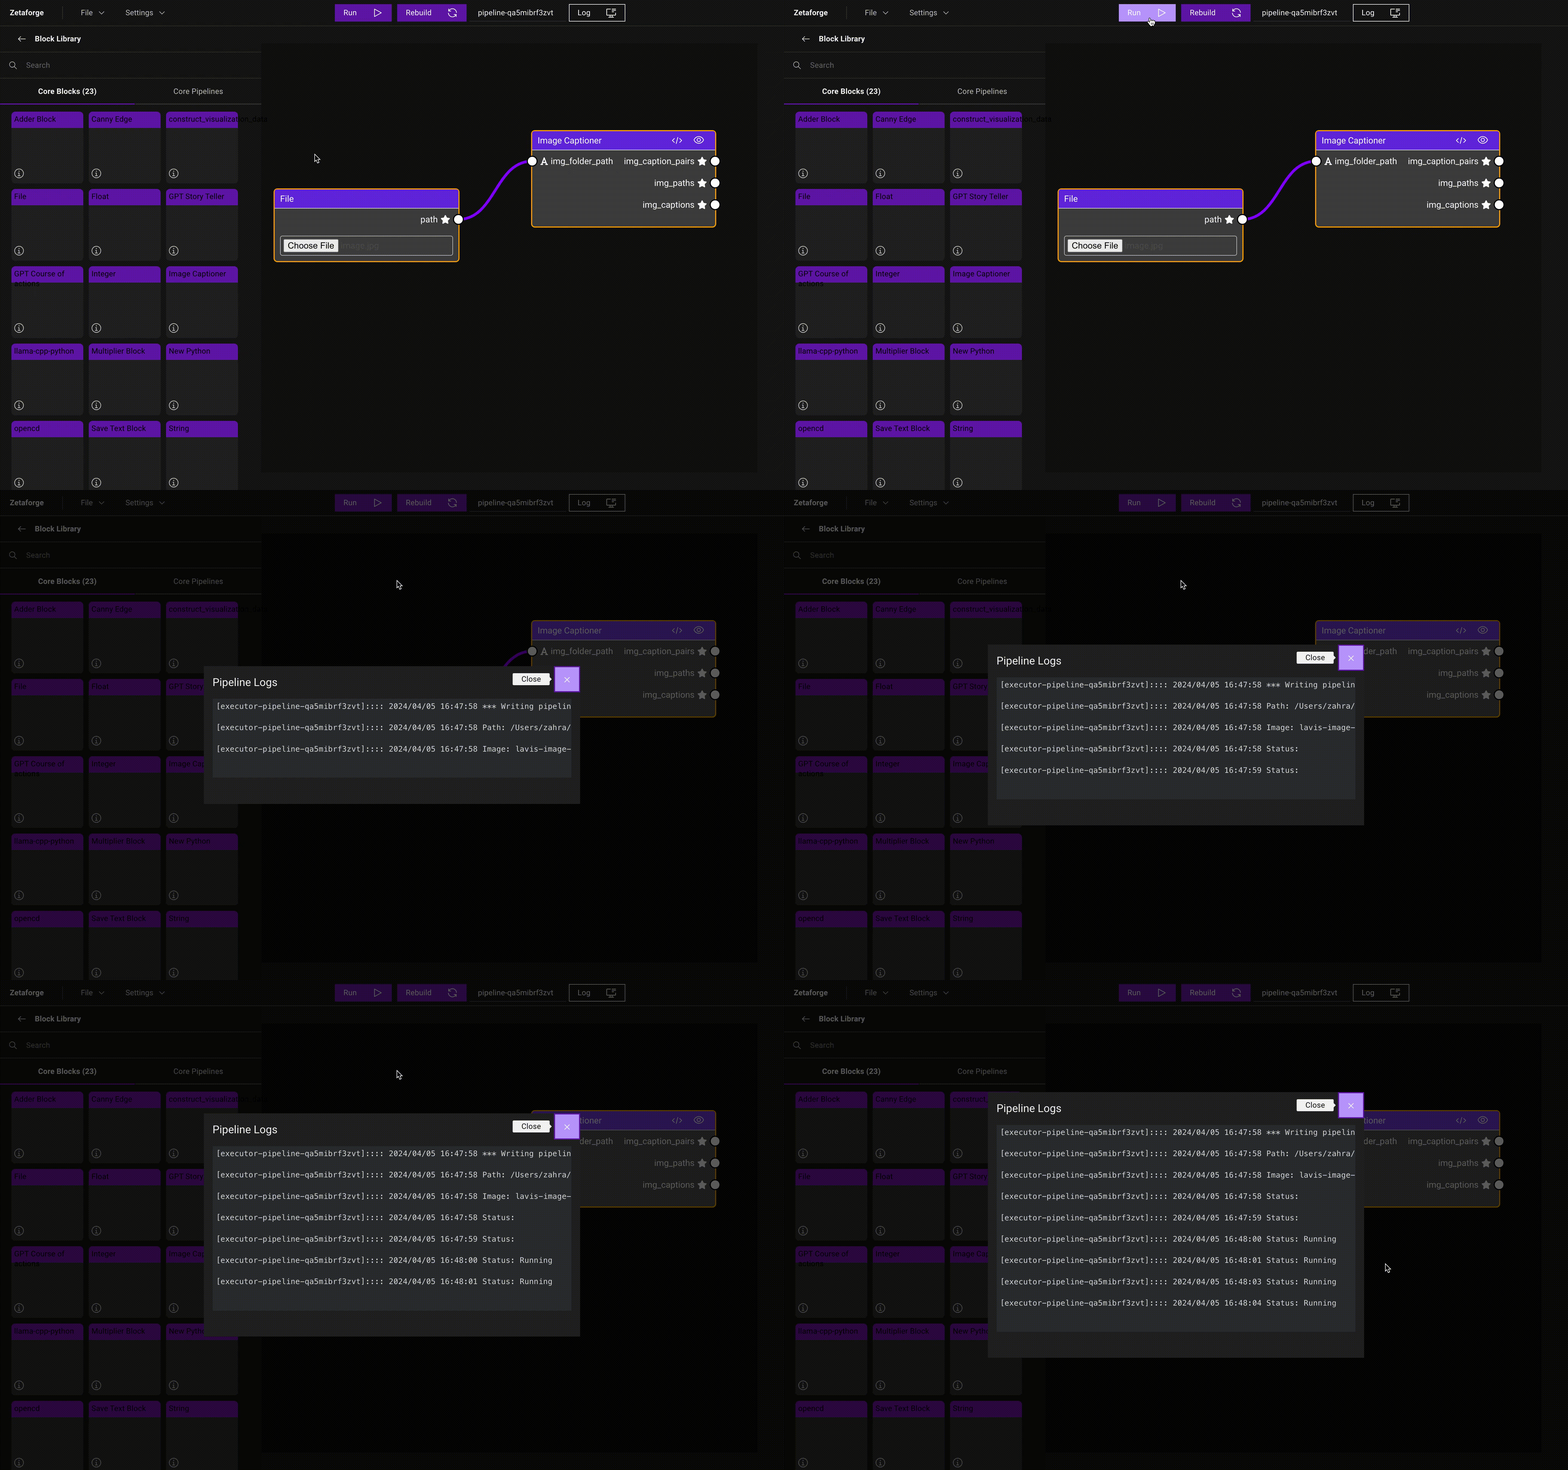
Run a Pipeline
Prior to running a Pipeline, you need to ensure that all the necessary Blocks are in the workspace and the links between
Blocks have been correctly established. Also, when applicable, inputs should be provided. If you have made any changes
to a Block, make sure to save and compile those changes before running the Pipeline.
When everything is in place, run the Pipeline by
clicking the Run button.

Once the Pipeline begins running, you can review the logs by clicking on the Log button. When you run a Pipeline for
the first time, Docker images are built. After that, the containers are executed without rebuilding if
no changes have been made. Therefore, the first time you build the Docker images usually takes more time.
Upon running a Pipeline, a new directory named history is formed within the Pipeline directory under
frontend/.cache/pipeline-${pipeline_id}. Within this directory, there is a unique subdirectory generated
for each run, identified by a distinct UUID. Each of these subdirectories contains folders for
files and logs, where output files and log files are stored, respectively.
Moreover, there's a pipeline folder including a pipeline.json file that outlines the Pipeline's structure
and connections between the Blocks. If the run is successful, a results.json file is created in the results
directory, capturing detailed information about the Pipeline execution, including Block inputs and outputs.