Blocks
Blocks are the core elements of Pipelines. ZetaForge comes with a set of predefined Blocks; however, you can easily add Blocks to ZetaForge and share them with the community.
When Blocks are designed with reusability in mind, they can be utilized in various Pipelines in a plug-and-play fashion which saves a lot of time. ZetaForge allows users to reuse Blocks with a simple drag-and-drop and modify the Blocks when necessary without having to leave the application or follow complicated logic. These modifications can also be made with the assistance of an AI agent, such as GPT-4, within the platform to make your coding experience smoother.
Below, we explain more about Blocks and their components and how to create or modify them.
Block Components
Each Block is composed of different components depending on its type. There are three types of Blocks:
- Parameter Blocks: Represent the type and value of input data.
- Compute Blocks: Implement a logic.
- View Blocks: Create and display visualizations.
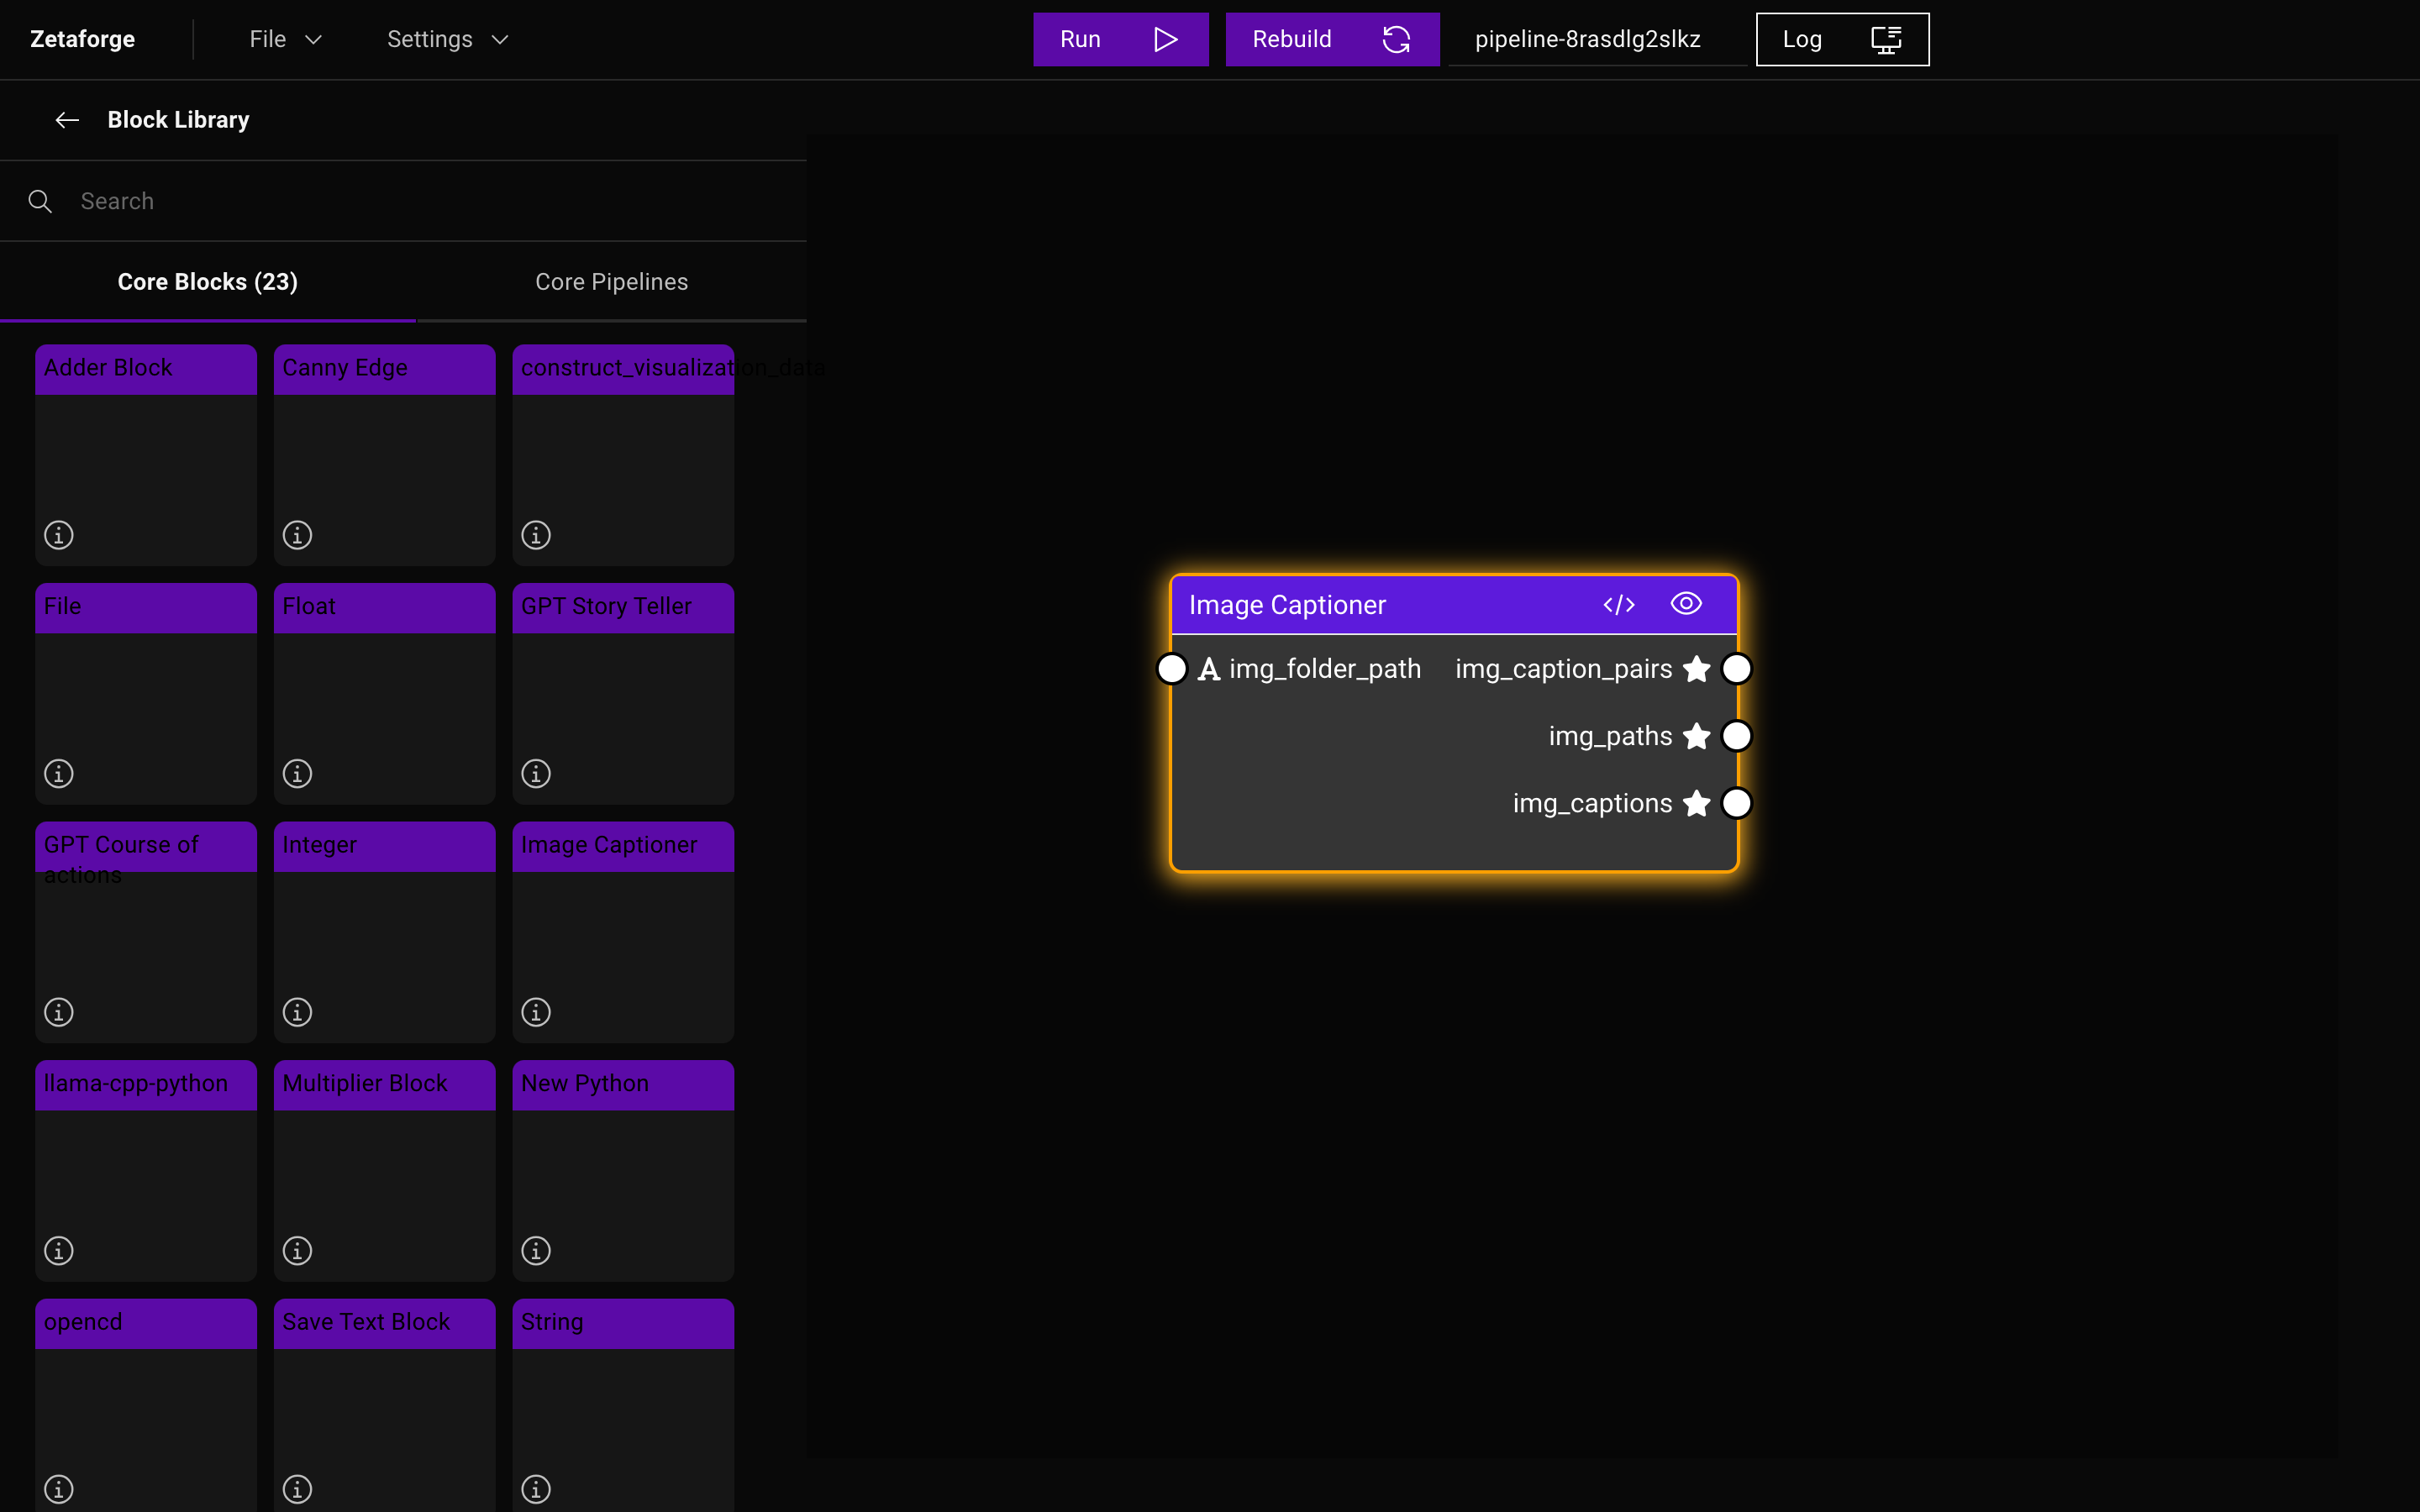
Most of the time, we create new Compute Blocks and View Blocks, and use existing Parameter Blocks. Some examples of Parameter Blocks are
File, String, Float, Integer, String List, and Text, while Train Iris, Canny Edge are Compute Block
examples, and View Numpy is a View Block.
Parameter Blocks do not have any input nodes; instead, they have a UI element that needs to be filled or selected. On the other hand, Compute Blocks have both input and output nodes. View Blocks have a small box on top that will visualize its input based on the implemented logic in that View Block.
Each Block, regardless of its type, is saved in a directory named after the Block in frontend/core/blocks. However,
the content of the directory representing a Block varies depending on its type.
Components of Parameter Blocks
Parameter Blocks are represented using only one file, which is the specs file of that Block. The specs file includes all
the structural information about a Block and is stored in frontend/core/blocks/{block-name}/specs.json.
Components of Compute Blocks
A directory representing a Compute Block should contain five files:
-
computations.py: Includes (at least)compute(args)andtest(args)functions. Thecomputefunction implements the logic of the Block, while thetestfunction is designed to test the compute function. Thecomputefunction returns a dictionary with keys that match the output node names from the specs file. -
Dockerfile: Describes the instructions to build a Docker image. This file should always includeCOPY computations.py .. -
requirements.txt: Includes packages required to run the code. -
run_test.py: Builds a test image and runs that image using Docker to test the Block and saves the Docker logs. -
specs.json: Includes the structural information about the Block.
Components of View Blocks
The role of View Blocks is to create and display visualizations for the computed Block outputs.
View Blocks have the same five components as the Compute Blocks; i.e., computations.py, Dockerfile, requirements.txt,
run_test.py, and specs.json. Using View Blocks, we create HTML-formatted visualizations that will be visualized
on top of the View Block as the Pipeline runs.
Creating Blocks
To create a Block, use a template Block listed on the sidebar. You can drag and drop a template Block, such as
New Python, and modify its components to build your own Block.
Modifying Blocks with the Block Editor
To make any modifications, click on the </ > icon to open the Block Editor sidebar on the right.
To modify the compute or view logic, simply edit the compute function. You can add as many lines of code as you like to the
computations.py file.
Block Templates
The computations.py file should follow this template:
import ...

def compute(in1, in2, in3,...):
    """
    Description
    """

    # Some code

    return {'out1': out1, 'out2': out2, ...}

def test():
    print("Running test")
    # Some test code
The compute function of a View Block follows the same logic with some slight differences:
import uuid
import json
import ...

def compute(in1,...):
    """
    Description
    """

    html_template = """
    <!DOCTYPE html>
    <html>
    ...
    <!-- Some html code... -->
    </html>
    """

    unique_id = str(uuid.uuid4())
    html_path = f"viz_{unique_id}.html"
    in1_str = json.dumps(in1)
    # $PLACEHOLDER is a placeholder for in1 in the html template.
    html_code = html_template.replace("$PLACEHOLDER", in1_str)

    with open(html_path, "w") as file:
        file.write(html_code)

    return {"html": f"viz_{unique_id}.html"}

def test():
    print("Running test")
    # Some test code
The Block structure will be inferred from the signature of the compute function. Note that the return value of the compute function should always be a dictionary with keys and values corresponding to the output of the Block.
Saving Changes to Blocks
You can save the changes you made to a Block by compiling that Block inside the Block Editor. Just look for the "compile Block files" button as shown below:
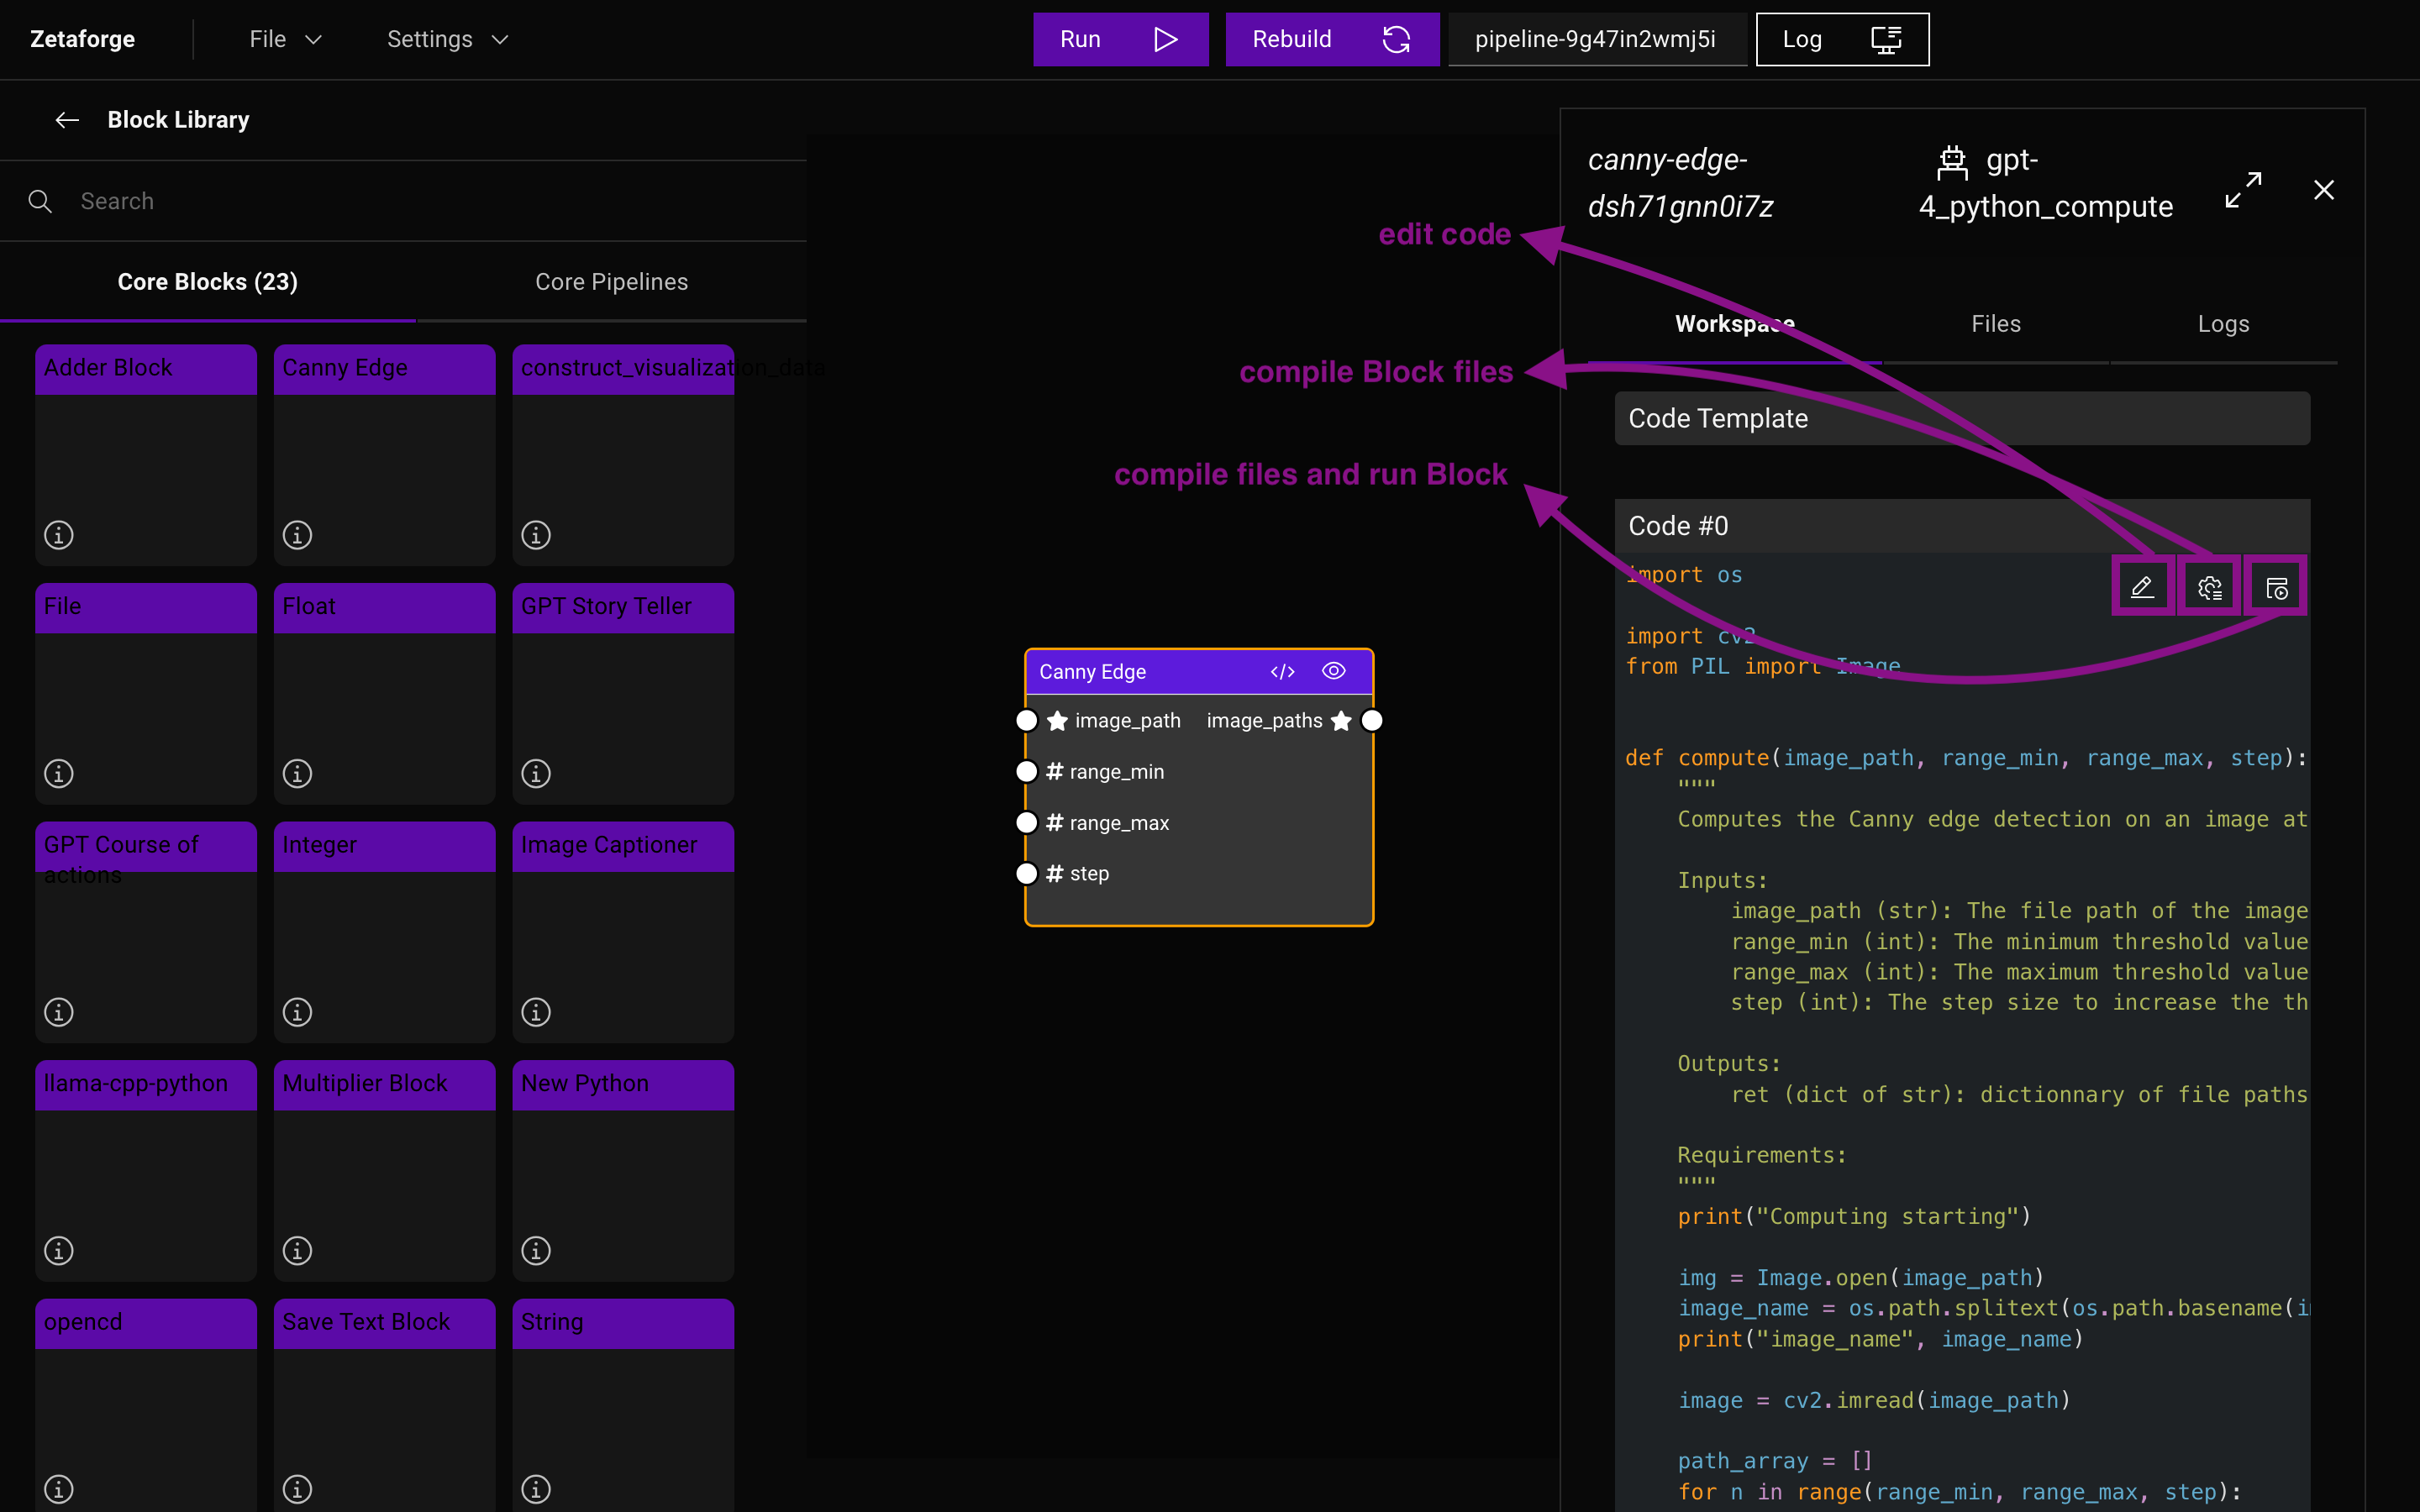
The "compile files and run Block" button will compile the changes and run the test functions specified by the test
function inside the computations.py file.
To learn more about the Block Editor, please refer to our user interface guide.